


Assigning access to your Facebook Page and Ad Account within Meta Business Settings is a secure way to manage permissions for team members, partners, or agencies. (Remember if you have new profile or inactive profile, you need to create your new business manager). Here’s a step-by-step guide to ensure access is assigned correctly.
Step 1: Access Meta Business Settings
1. Go to business.facebook.com/settings to directly access Meta Business Settings.(They might ask you to create a new business manager if you didn’t have that previously, at that step, you need to add your name, business name and business email and submit. After confirming your email, you’ll be redirected to the business settings page).
2. Log in with your Meta Business Manager account credentials, which will open the main settings dashboard.
Step 2: Adding a Person to Your Business
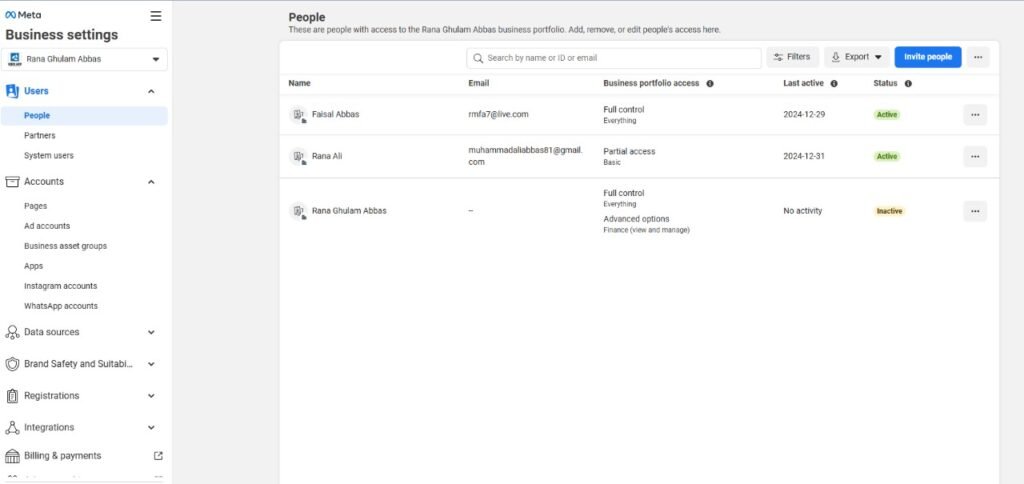
1. In Business Settings, click People on the left-hand menu.
2.Click Invite in the top-right corner.
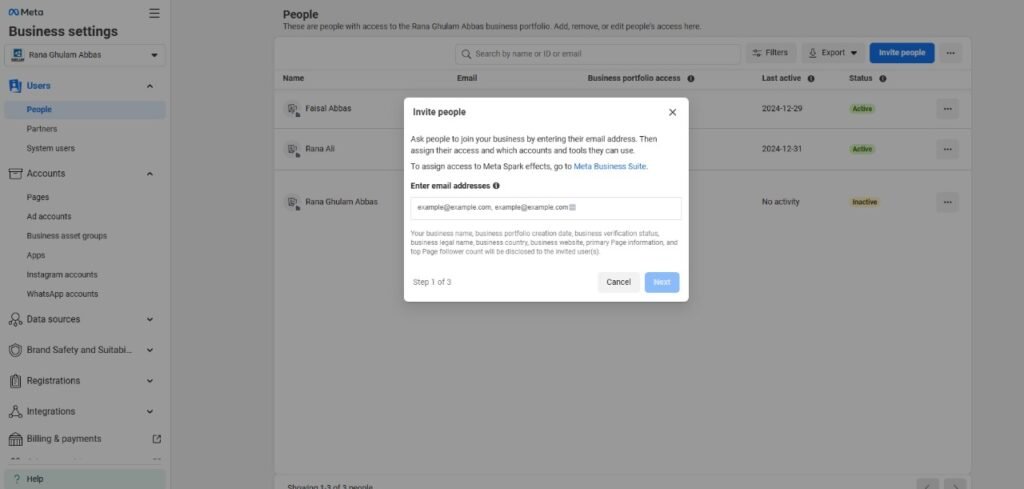
3. Enter the email address of the person you want to assign access to. (If you are adding me, then use muhammadaliabbas81@gmail.com)
4. Choose Full Control (Everything) if you want them to have full control or Partial Access (Basic) for more restricted permissions.
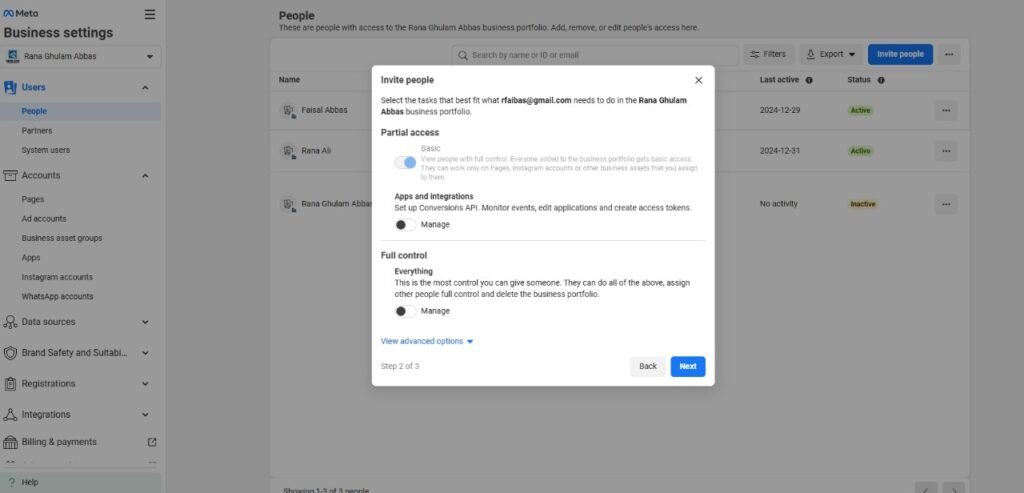
Click Next to proceed to asset access options.
Step 3: Select Assets and Assign Permissions
Step 3a: Assign Access to Your Facebook Page
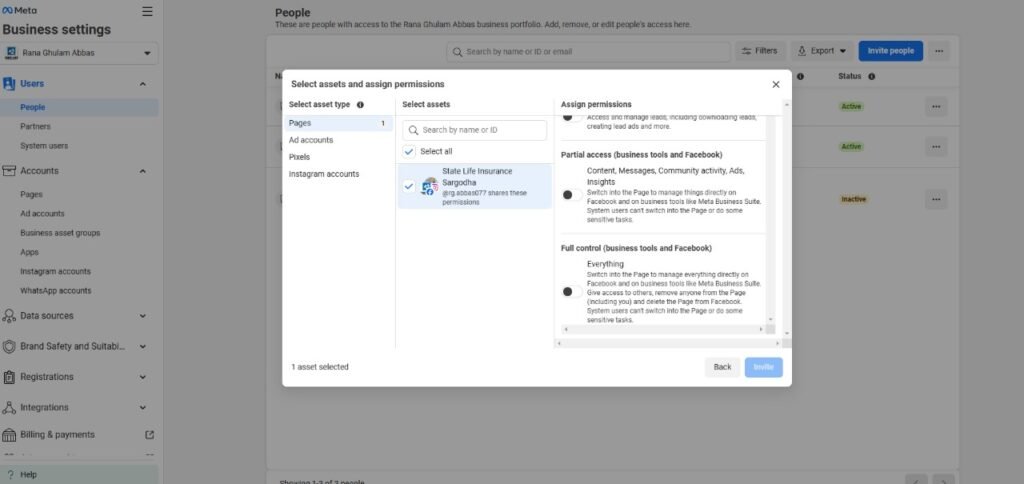
1. After inviting the person, the next screen will ask for assets to select. Click on Pages.
2. Select the Page you want to assign access to.
3. Check the appropriate permissions you’d like them to have. Options include:
- Partial Access (Business Tools Only) for restricted access to specific actions.
- Partial Access (Business Tools and Facebook) to post, comment, or manage ads. (this is the access that you’ll normally select)
- Full Contro (Business Tools and Facebook) to manage everything. (Not recommended to give access to anybody).
4. Once you’ve selected the permissions, click Invite or Select other assets from the left side..
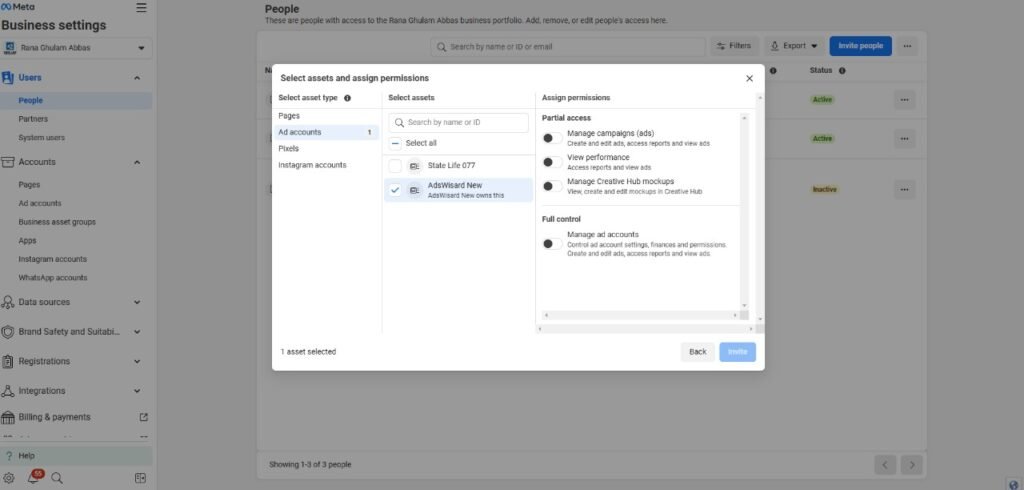
Step 3b: Assign Access to Your Ad Account
1. From the same pop up that appeared from our previous step, select Ad Accounts from the left side.
2. Choose the Ad Account you want to assign access to.
3. Set the permissions level for the ad account:
- Partial Access to create, edit, or view ads but not manage billing or account settings.(this is the recommended option here).
- Full Control for complete access.
4. Once you’ve selected the permissions, click Invite or Select other assets from the left side..
Step 3b: Assign Access to Your Ad Account
1. (Or in Business Settings, scroll down in the left-hand menu and select Ad Accounts).
2. Choose the Ad Account you want to assign access to.
3. Click Assign Partners or Add People if they’re already added to your Business Manager.
4. Set the permissions level for the ad account:
- Full Control for complete access.
- Manage Campaigns to create, edit, or view ads but not manage billing or account settings.
- View Performance to view ad results without editing access.
5. Click Save Changes to finalize the permissions.
Step 3c: Assign Access to Your Pixel (Datasets)
- From the same popup, click on Pixels from the left side.
2. Choose the Pixel you want to assign access to.
3. Set the permissions level for the Pixel:
- Partial Access to View and analyze pixel performance in Facebook analytics. Create conversion ads.
- Full Control to Create, edit and view pixels. Add or remove pixel events. Create pixel audiences and conversion ads. Add, edit and remove pixel users..
3. Once you’ve selected the permissions, click Invite from the left side..

Step 4: Confirming and Completing Access
1. The invited person will receive an email notification prompting them to accept the access.
2. Once you’ve selected the permissions, click Invite from the left side
Comments are closed